Punch Mismatches – why do they sometime not work for me?
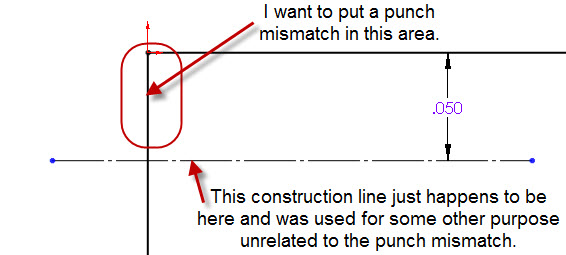
Punch Mismatches are one of many really cool and fast automation tools in LogoPress. But first of all, they need a little room in order to complete properly and secondly, they don’t like extra entities getting in their way.
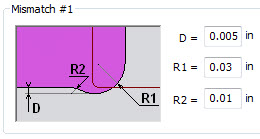
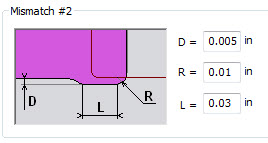
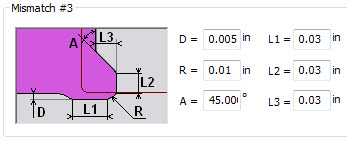
Below are my personal preferred settings for my punch mismatches. If you work on thinner material most of the time or thicker material most of the time, you may want something different for your default sizes. (These LogoPress options are found in the SolidWorks Options box at the very bottom, the button that says Third Party…)
Rule #1 for Punch Mismatches is that the first pick is on the line where you want the mismatch to cut into(99% of the time this is on the sketch line or arc that is touching the part as opposed to the one that is in the skeleton/scrap), and the second pick is the adjacent line. So after selecting a punch mismatch style #2 and picking the left hand line first and the top line second I end up with this:
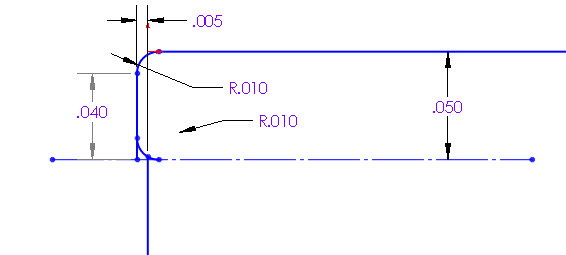
That’s not what I wanted! I realize now that the construction line that is 0.050″ away from the top line got in the way of the automation that took place when the mismatch was getting automatically put in and trimmed. So what if that construction line would have been 0.080″ away rather than 0.050″?
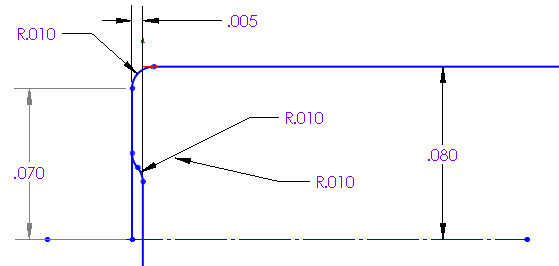
That’s better, but there’s still obviously a problem.
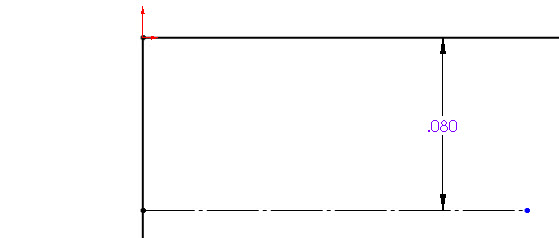
So what if that construction line was trimmed to the main line as show below?
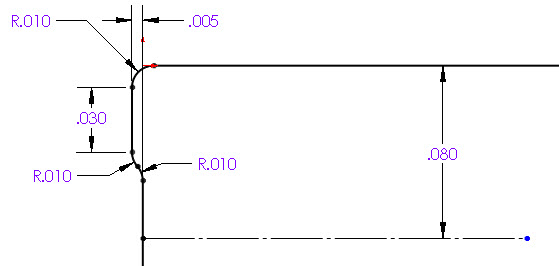
See the picture below – THAT’S what I wanted!
Also, keep in mind that similar rules apply if you are trying to put a mismatch in at an area that is too small to fit the default mismatch sizes that are in your LogoPress third party options settings. So if you are putting a mismatch into a tiny area you may need to go into your third party options and make the sizes (radii sizes and, in the case of mismatches #2 & #3 the length of straight areas) smaller…
Topics
- -IMPORTANT-1- info for LP users
- -IMPORTANT-2- info for LP users
- LP 123GO Light
- LP 123GO Full
- LP How-To's for users
- LP Standard Components
- LP tips & tricks
- LP Unbending
- LP Warning messages
- SolidWorks tips & tricks
- General tips & tricks for all
- Windows tips & tricks
- A great use for WAX (stretch webs)
- Computer performance
- Computer benchmark
- Software we use
- FREE software
- Uncategorized