5 Hour Complete Die Design including Drawings & Engineering Changes
The goal of this video is not to prove that we can create an average die design in 5 hours. Of course this is a very simple part and we planned and practiced all that we did before creating these 6 videos below. Our goal is to show the entire process, method and philosophy of LogoPress die design software in order to illustrate its ease of use, its efficiency and how we can improve productivity along with design quality.
Click Here to download the same Parasolid file used in these videos if you would like to compare what we do in this series of videos with how these things are done with your current method of die design.

(3:07:12) In this first and longest video of the series, the 3D modeling of the die is completed. Starting with a dumb imported part that could have come from any CAD system, the part is unbent, the individual stations of the strip are created using LogoPress "Station Marks", LogoPress "Part preparation before strip starting" is used, the strip assembly is created while adjusting the strip parameters (part rotation, progression, strip width,….) and all of the cutting and forming punches are created.
At the end of the strip creation the strip information is automatically generated and written both to the right of the strip in the SOLIDWORKS graphics window and it is also saved in an Excel spreadsheet into the folder that contains the strip. This strip information note includes such information as strip width, progression, stock thickness and width; various forces in the die; number of stations; material loss; perimeter around punches, etc.
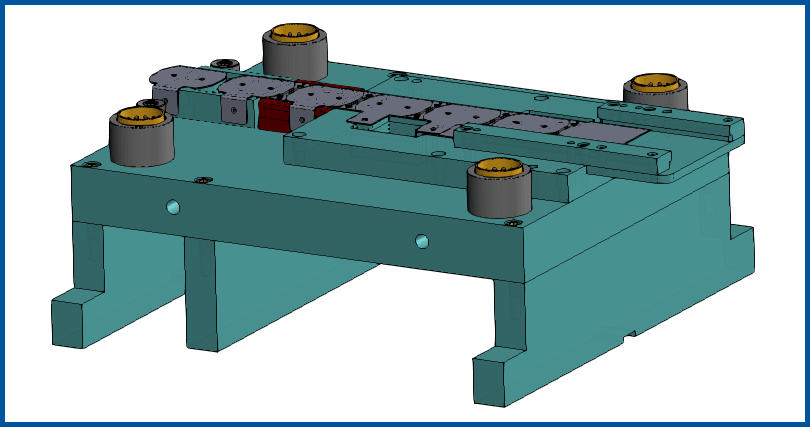
The tool assembly is created, starting from a simple tool template that is used for demonstration purposes. (It is recommended that the user has a more complete tool template to start with.) Plates are added, resized and mated. Punches are mounted (cutting proper clearance through all plates) and standard catalog components are added.

(47:56) In under an hour all detail drawings and plan views are created, and the bill of materials (BOM) is automatically generated. This includes the creation of balloons with their numbers in order, LogoPress hole tables, automatic population of title blocks (with Added Custom Properties), adding Wire EDM start holes, LogoPress Smart Ordinate Dimensions, etc.

(8:29) An engineering change to widen the leg and moving the dimple is necessary after the design is completely modeled and detailed. This change is made to the dumb imported part using the SOLIDWORKS direct modeling command Move Face. (After using this command, the features that were created by this command are in the SOLIDWORKS FeatureManager tree as part of the history of the part and are parametric.)
The LogoPress command "Update the stations of the annex part used in the strip" is used and this causes the strip assembly and the tool assembly to both automatically update thanks to SOLIDWORKS being parametric.
The total time for this engineering change, including updating 2D drawings, is under 9 minutes.

(22:54) A much more extensive engineering change is made by adding flats to the width of the part, thereby making the part narrower, necessitating a change to the progression throughout the completed die design. This new geometry that includes these flats is converted into the existing cutting punches. The progression of the strip is reduced which makes it necessary to change the length of plates and move plates and move Standard Components in the tool assembly.
The solid models and the bill of materials and detail drawings all update automatically along with the hole tables thanks to SOLIDWORKS being parametric.
The total time for this engineering change is less than 23 minutes.

(20:14) LogoPress DIE DEBUGGER is used and interferences are noted and the corrections are made in the tool assembly. The detail drawings update automatically along with the hole tables thanks to SOLIDWORKS being parametric.

(34:04) The LogoPress command “Assembly Color/Transparency” is discussed and demonstrated. While die designers using LogoPress prefer to design using transparency in order to minimize mistakes, this transparency of the die assembly sometimes makes it difficult and confusing to understand for those that did not design the die. The LogoPress command “Assembly Color/Transparency” is used to make the tool assembly opaque (solid) during the design review. (After the design review the die designer simply needs to revert back to transparency by switching to the default display state in the model.)
A few issues are found during the final review and addressed, including tightening the clearance around the heels of the trimming punches.
Another issue is found while running the SOLIDWORKS Interference Detection command (this is a totally different command than the LogoPress Dynamic Interference Detection command) during the review and then corrected in the tool assembly. It is stressed that it is very important to run both SOLIDWORKS Interference Detection as well as LogoPress Dynamic Interference Detection.
As the final changes are made, the detail drawings update automatically along with the hole tables thanks to SOLIDWORKS being parametric.